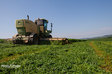
Before the onset of using near infrared reflectance spectroscopy (NIRS) as a forage testing tool, there were good reasons why few farmers didn’t routinely test forages. Most notable among these reasons were that wet chemistry procedures were both expensive and they took time.
These days of post-NIRS, there are really few good reasons not to test all produced forages given that it’s all fed to livestock or sold and then fed to livestock. Testing forage ensures that the feed will be properly utilized or that a hay buyer is getting what they pay for. Still, many farmers and hay buyers don’t have an interest in forage testing.
The reasons I hear for not testing are that it’s too time consuming, it’ too expensive, or their buyers aren’t interested in test results, so there is no point in sampling. Those first two reasons are somewhat subjective and do not take into the account the certain payback realized when the information on the forage analysis is used appropriately. Many farmers view forage testing as a necessity — not a luxury.
The third excuse of “my buyers aren’t interested” seems legitimate on the surface, but it seems that it would be helpful to have forage tests on your own production to track progress and performance over time. Maybe your production isn’t as good as you think, or maybe it’s better? You can’t know unless you test.
Do it right
There’s no denying that doing a good job of forage testing requires some time and labor. In fact, it’s almost mandatory if the results are to truly represent the forage being tested, which is the end goal. Forage sampling and testing shouldn’t be an exercise in random number generation. There are proven procedures to follow on the farm just as there are in the lab.
We can never eliminate sampling variation, but it can be controlled. That’s accomplished by following a research-proven set of protocols set forth by the National Forage Testing Association (NFTA). They are:
1. Identify and sample only a single lot of hay: An individual hay lot is comprised of a single cutting and a single field, baled within a 48-hour period. The maximum amount of hay in a single lot should be 200 tons or less, preferably much less.
2. Sample close to the point of sale or feeding. Although testing right after harvest isn’t a bad idea to offer a guide as to what is going into inventory, realize that moisture and, to a lesser degree, forage quality can change during storage.
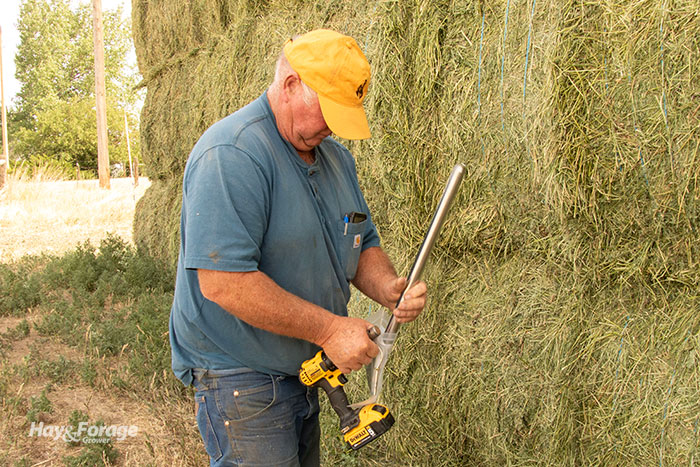
3. Use a sharp, well-designed hay probe. The probe opening should be 3/8 to 3/4 inch and not slanted. Many excellent probes are available for purchase, but many inferior probes are available as well. Pick a good one, even if the initial cost is a little higher.
4. Take enough cores. This is often the biggest mistake that is made. Research shows that you need at least 20 cores, perhaps more, for extremely variable or larger lots. It’s the core number that helps reduce variation. Taking only a few probes will almost always yield misleading results.
5. Take random samples. Sample systematically and don’t eliminate bales. Although sometimes access is limited in a stack, at least 20 different bales still need to be randomly selected for probing.
6. Use proper technique. Angle the probe 90 degrees from the center of the butt end of the bale, inserting the shaft about 12 to 18 inches deep.
7. Take the right amount. A sample needs to be large enough to represent the lot, but not so large that the lab can’t or won’t grind the entire sample. Ideally, you don’t want the lab to subsample your submitted sample. The right size is about 250 grams or 1/2 pound.
8. Handle samples correctly. Seal or double-seal the sample in a ziplocked bag. Keep the sample cool and out of the sun and submit it to the lab as soon as possible.
9. Choose a qualified lab. Ensure the lab you’re working with is certified by the NFTA. The NFTA sends forage testing labs check samples, already finely ground, to address and ensure analytic accuracy.